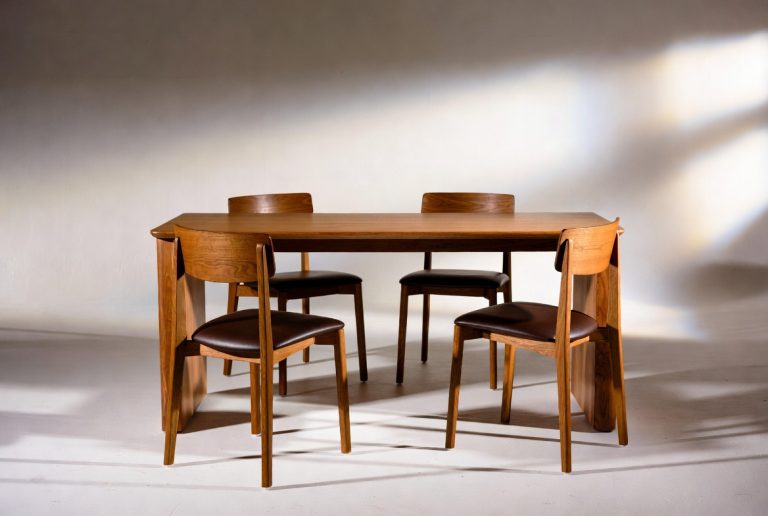
How to Cover Leather Dining Chairs: A Complete Step-by-Step Guide
Let me be honest with you—leather dining chairs are a statement piece. They look gorgeous, they feel premium, and they command attention in any dining room. But here’s the thing: leather ages, it scratches, it stains, and sometimes it just doesn’t match your new decor anymore. So what do you do when your beloved chairs need a refresh? You cover them, of course. And I’m here to walk you through exactly how to do it.
Whether you’re looking to protect your investment from further damage, update your interior design, or simply breathe new life into tired-looking furniture, learning how to cover leather dining chairs is a game-changer. This isn’t as complicated as you might think, and honestly, it’s way more affordable than replacing those chairs entirely.
Before you jump into the covering process, we need to talk about what you’re working with. Not all leather is created equal, and understanding your chair’s current condition will help you make better decisions about your covering method.
Assessing the Current Condition of Your Chairs
Take a good look at your leather dining chairs right now. Are there visible cracks? Peeling areas? Deep stains that won’t come out? The condition of your chairs will determine whether you need to prep them before covering. If your leather is still in decent shape but just looking tired, that’s actually ideal for covering. You won’t need extensive preparation. However, if you’ve got significant damage, you might want to address those issues first to ensure your covering sits smoothly.
Identifying the Type of Leather You Have
Here’s something most people overlook: knowing whether your chairs are genuine leather or faux leather matters. Genuine leather has natural pores and a unique feel, while faux leather is synthetic. Why does this matter? Because the way you prep and cover each type differs slightly. Genuine leather is more forgiving and breathable, whereas faux leather can be more prone to cracking if not handled carefully.
Materials and Tools You’ll Need
Let’s talk about gathering your supplies. This is where preparation meets execution, and having everything ready before you start will save you frustration and time.
Essential Materials for Covering
- Fabric of your choice (upholstery fabric, cotton, linen, or faux leather)
- Measuring tape
- Scissors or rotary cutter
- Upholstery stapler and staples
- Fabric glue or contact cement
- Needle and thread or upholstery thread
- Foam padding (optional but recommended)
- Batting or underlay
- Webbing for reinforcement
Tools That Make the Job Easier
Now, you don’t need every tool under the sun, but a few key ones will make your life significantly easier. An electric upholstery stapler is honestly worth its weight in gold if you’re doing multiple chairs. A seam ripper helps if you need to remove old fabric, and a staple remover gets out those stubborn staples without damaging your frame. A heat gun can help with fabric stretching, and a regulator tool helps maintain tension while you’re stapling.
Choosing the Right Covering Material
This decision is crucial because it affects both the look and longevity of your project. You’re not just picking something that looks nice—you’re choosing something that will withstand daily use in your dining room.
Comparing Different Fabric Options
Let’s break down your options. Microsuede is durable, soft, and resistant to staining—perfect if you’ve got kids or pets. Performance fabrics are engineered to resist wear and tear, making them ideal for high-traffic dining areas. Faux leather offers that luxurious look without the price tag and is incredibly easy to clean. Real upholstery fabric comes in endless patterns and textures but requires more care. Linen is elegant and breathable but stains more easily. Cotton is affordable and comes in tons of colors but isn’t as durable as other options.
Color and Pattern Considerations
Think about your dining room’s overall aesthetic. Are you going for a modern look, a cozy farmhouse vibe, or something traditional? Light colors show dirt and stains more easily, so consider medium to dark tones if you want low maintenance. Patterns can hide imperfections better than solids, and they add visual interest to your space. Remember, you’ll be looking at these chairs every day, so choose something you genuinely love, not just what’s on sale.
Measuring Your Dining Chairs Accurately
Measurement errors are the enemy of a clean, professional-looking finished product. Let’s make sure you get this right.
Step-by-Step Measurement Process
Start by measuring the seat cushion width, depth, and height. Measure from one side rail to the other, front to back, and top to bottom. Then measure the backrest—width, height, and the curve if there is one. Don’t forget the side panels and any decorative elements. Write everything down and add two inches to each measurement for overlap. You want enough fabric to work with comfortably, but not so much that you’re wasteful.
Calculating Fabric Requirements
Add up all your measurements and consider the pattern repeat if your fabric has one. As a general rule, one dining chair requires about three to four yards of fabric, depending on size. If you’re covering multiple chairs, buy extra—about ten to fifteen percent more than your calculations suggest. This accounts for mistakes, shrinkage, and pattern matching.
Preparing Your Workspace and Chairs
Think of this as setting the stage for a successful performance. A clean, organized workspace prevents mistakes and makes the entire process more enjoyable.
Creating an Ideal Work Environment
Find a large, flat surface to work on. Your dining table, a workshop table, or even a clean garage floor works perfectly. Make sure you have good lighting—you don’t want to miss spots or make mistakes because you can’t see clearly. Clear the area of distractions and gather all your tools within arm’s reach. This isn’t just about convenience; it’s about maintaining focus and accuracy throughout the project.
Cleaning Your Leather Chairs
Before you do anything else, clean your leather chairs thoroughly. Use a leather cleaner or a mixture of mild soap and water. Wipe down the entire surface, removing dirt, dust, and any sticky residue. Let them dry completely—this is important because any moisture under your new covering can cause problems down the road. A clean surface also helps your new fabric adhere better and sit more smoothly.
Removing Old Fabric and Padding
Depending on your approach, you might remove the old covering entirely or work over it. Let me walk you through both scenarios.
When to Remove Existing Upholstery
Remove the old fabric if it’s bulky, torn, or if you want a truly smooth finish. Use a seam ripper to cut through threads carefully, and a staple remover for staples. Work systematically, removing one section at a time. Keep track of how the original upholstery was constructed—you might learn valuable techniques to replicate. If the padding underneath is still in good condition, you can leave it. If it’s compressed or damaged, now’s the time to replace it.
Preparing the Chair Frame
Once the old covering is off, inspect the frame. Look for loose joints, nails, or staples that could cause problems. Tighten any loose connections and sand down rough spots. If the chair frame is wobbly, this is your chance to fix it before covering it up. A sturdy frame makes all the difference in a quality finished product.
The Covering Process: Two Main Methods
You’ve got options here, and the method you choose depends on your skill level and the look you want to achieve.
Method One: Slip Covers for Easy Application
A slip cover is like a custom-fitted pillowcase for your chair. It’s the easier route and perfect if you want to be able to remove and wash your covering periodically. Create a pattern using paper, pin it to your fabric, and cut. Sew panels together, leaving openings for the chair legs. Add elastic or ties to secure it in place. This method is forgiving because you can adjust fit as you sew, and if something doesn’t look right, it’s easy to fix.
Method Two: Direct Fabric Application
This method involves stretching fabric directly over the chair structure and securing it with staples. It looks more polished and professional, but it requires more skill and precision. Cut your fabric panels to size, position them on the chair, and staple as you go. This method creates a seamless, tailored appearance that really elevates your dining chairs.
Step-by-Step: Direct Fabric Application Method
Since this is the more challenging method, let me break it down into manageable steps.
Covering the Seat Cushion First
Start with the seat—it’s the most visible part. Cut your fabric slightly larger than the seat. Place it over the top, centering your pattern if there is one. Fold the fabric underneath the seat and staple it to the underside, working from the center outward. This prevents wrinkles and ensures even tension. Staple the front edge first, pulling fabric taut but not so tight that you distort the pattern or damage the weave. Then do the back, then the sides, mitering the corners for a clean look.
Securing the Backrest Fabric
The backrest requires similar technique but with more attention to shaping. If your backrest is curved, you’ll need to make strategic cuts or use a heat gun to stretch the fabric slightly. Start at the top center and work your way down and around, stapling as you go. For backrests with a pronounced curve, you might need to make small vertical cuts at the edges to allow the fabric to conform to the shape without bunching.
Handling Corners and Edges
Corners are where amateurs and professionals part ways. For a clean corner, fold your fabric like you’re wrapping a present. Bring the side fabric up and fold it at a forty-five-degree angle, creating a diagonal fold. Fold the adjacent piece over it, creating a tight, hospital-corner appearance. This takes practice, but once you nail it, your chairs will look incredibly professional.
Finishing Touches and Sealing
We’re in the home stretch now. These final steps make the difference between a good recovery and a great one.
Adding Decorative Elements
Consider adding trim, piping, or welting around seams and edges. This hides raw edges, adds visual interest, and gives your chairs a designer touch. Nailhead trim is particularly popular for dining chairs and adds a touch of sophistication. Fabric glue or a hammer and nails secure these elements in place. Take your time here—neat, straight trim makes all the difference.
Protecting Your Work
Once your chairs are covered, consider applying a fabric protector. These products create an invisible barrier that resists stains and spills. Many high-end upholstery pieces are treated with protective coatings at the factory. You can replicate this at home with products specifically designed for your fabric type. Spray on, let dry, and enjoy the peace of mind that comes with knowing your beautiful new covering is protected.
Maintenance Tips to Extend Your Chair Covering
You’ve put in the work, so let’s keep those chairs looking fresh.
Regular Cleaning Routine
Vacuum your chairs weekly using a soft brush attachment. This prevents dirt from accumulating in fibers. For spills, blot immediately with a clean, damp cloth—don’t rub, as this can spread the stain and damage fibers. For deeper cleaning, use a fabric-safe cleaner appropriate for your material. Always test any cleaner on a hidden area first to ensure it doesn’t cause discoloration or damage.
Addressing Wear and Tear
Inspect your chairs regularly for loose staples, fraying edges, or fabric thinning. Address problems as soon as they appear. Restitch loose seams, add staples if needed, and if piping or trim is coming loose, reglue it immediately. Catching issues early prevents small problems from becoming big ones.
Conclusion
Learning how to cover leather dining chairs is an investment in both your skills and your home’s appearance. What started as a task that seemed daunting is actually quite achievable with patience, proper planning, and attention to detail. Whether you choose the simpler slip cover method or tackle direct fabric application, you’re giving your dining room a fresh new look without the expense of new furniture.
The key to success is taking your time, measuring carefully, and not cutting corners on materials. Your dining chairs aren’t just functional—they’re part of your daily life and your home’s design narrative. By covering them thoughtfully, you’re creating pieces that reflect your personal style and taste. So gather your materials, clear your workspace, and get started. Your newly covered leather dining chairs are waiting to impress your family and guests.
Frequently Asked Questions
Can I cover leather dining chairs without removing the old leather?
Absolutely. If your leather is still structurally sound and not peeling or severely damaged, you can cover it directly. The existing leather provides a stable base. Just make sure to clean it thoroughly and rough it up slightly with sandpaper so your new fabric adheres better. This method saves time and keeps the chair’s original structure intact.
What’s the best fabric to use for dining chairs that get a lot of use?
Performance fabrics and microsuede are your best bets for high-traffic areas. These materials are specifically engineered to withstand wear, staining, and frequent cleaning. If you prefer the look of faux leather, high-quality performance faux leather is durable and elegant. Avoid delicate fabrics like silk or lightweight linen unless you’re willing to baby your chairs and deal with frequent professional cleaning.
How much does it cost to cover dining chairs yourself versus hiring a professional?
DIY covering typically costs between thirty and seventy dollars per chair, depending on fabric quality and complexity. Professional upholsterers charge anywhere from two hundred to five hundred dollars per chair. If you have four chairs, the savings from doing it yourself are substantial. Plus, you’ll gain valuable skills you can use on other furniture projects.
How long does a covered dining chair typically last?
With proper maintenance, a well-covered dining chair can last five to ten years or more. The lifespan depends heavily on fabric quality, how much the chairs are used, and how well you maintain them. High-quality performance fabrics hold up longer than standard upholstery fabrics. Regular cleaning and prompt attention to damage extend the life significantly.
Do I need special tools to cover dining chairs, or can I use things I already have at home?
You can do basic chair covering with household items, but certain tools make the job significantly easier and produce better results. A staple gun is really the only specialty item you absolutely need—these are affordable and useful for many household projects. If you don’t have one, you can borrow or rent. For best results, investing in an upholstery stapler, staple remover, and quality scissors makes the process more efficient and professional-looking.