
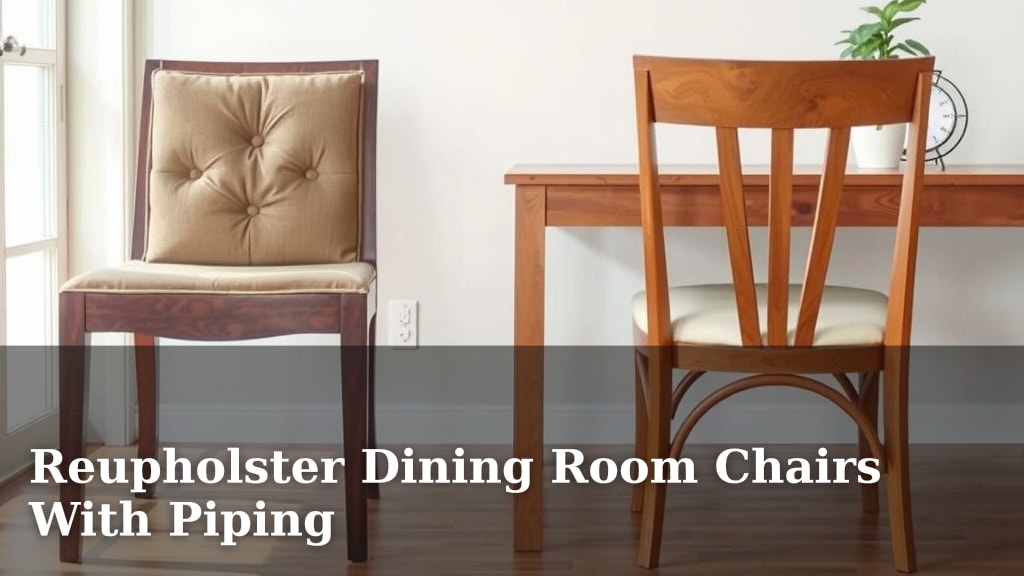
Reupholster Dining Room Chairs With Piping
Yes, you can absolutely reupholster dining room chairs with piping for a fresh, custom look! Adding piping, also known as welting cord, is a fantastic way to define the edges of your chair cushions and give them a professionally finished appearance. It’s a DIY project that can seriously upgrade your dining space without breaking the bank.
Reupholstering your dining chairs yourself can be a rewarding project. You get to choose your own fabrics and trims, making your chairs truly unique. Many people find that updating their chair upholstery is a more cost-effective way to change their dining room’s style than buying all new furniture. Plus, it’s a great way to give old, well-loved chairs a new lease on life.
- You can reupholster dining chairs with piping.
- Piping adds a polished, custom look to chair cushions.
- It’s a DIY-friendly project for a refreshed dining space.
- Choose your own fabrics for a personalized style.
- This can be more affordable than buying new chairs.
Ready to give your dining chairs a stylish makeover? Let’s walk through how to reupholster them with piping step by step.
“`htmlUpdating Your Dining Chairs with Piping: A DIY Guide
Adding piping to your dining chair upholstery is a fantastic way to achieve a designer look yourself. It’s not as complicated as you might think. This simple addition can make your chairs look brand new. You’ll define the edges beautifully. It’s a project many DIYers find very satisfying.
Why Add Piping to Your Dining Chairs?
You might be wondering what piping really does for a chair. Think of it like the trim on a fancy pillow. It gives a clean, finished edge. It adds a bit of texture and visual interest. It can also help protect the fabric edges from wear and tear. Many people choose contrasting piping for a bold statement. Others prefer a tone-on-tone look for a more subtle elegance.
The Aesthetic Benefits of Piping
Piping really does make a difference. It frames your cushion perfectly. It gives the upholstery a tailored appearance. Your chairs will look like they came from a high-end furniture store. This is especially true when you choose fabrics that pop. Even a simple fabric can look extra special with piping.
Durability and Protection
Beyond looks, piping can add a bit of protection. The cord inside the piping is often covered in a durable fabric. This helps reinforce the edges of your cushion. This can be particularly helpful for dining chairs that see a lot of use. Over time, exposed fabric edges can fray. Piping helps to prevent this, extending the life of your newly upholstered chairs.
Gathering Your Supplies for Success
Before you dive in, let’s make sure you have everything you need. Having all your materials ready will make the process much smoother. This is key to avoiding frustration. You don’t want to stop halfway through for a forgotten item.
Essential Upholstery Tools
You’ll need a few key tools to get the job done. A good staple gun is a must. You’ll want one that can handle upholstery staples. A hammer and pliers are also handy for pulling old staples and smoothing fabric. Shears for cutting fabric are essential. Don’t forget a utility knife or scissors for trimming excess fabric. A magnetic tack hammer can be a lifesaver for small nails.
Fabric and Piping Cords
Choosing your fabric is the fun part! For dining chairs, we recommend durable, easy-to-clean fabrics. Think about cotton blends, vinyl, or even a performance fabric. You’ll also need piping cord. This is a cording that comes in various thicknesses. Measure your chair cushions to figure out how much you’ll need. You can often buy pre-made piping, or you can make your own.
Making Your Own Piping
Making your own piping gives you the most control over the look. You’ll need fabric scraps and a thicker cording, like cotton rope. Cut fabric strips on the bias (diagonally across the weave). This allows the fabric to bend around curves. Fold the strip around the cord. Stitch close to the cord to create your piping. Many online tutorials show you how to do this in detail.

Step-by-Step: Reupholstering Your Dining Chairs
Ready to get your hands dirty? Let’s break down the process. Remember, patience is your friend here. Take your time, and don’t be afraid to restart a step if it doesn’t look right.
Step 1: Removing the Old Upholstery
This is where you’ll find out what’s underneath. Carefully peel back the old fabric. Use your pliers to pull out all the old staples. Keep track of how the fabric was folded and secured. Taking photos as you go can be incredibly helpful. This helps you remember the original construction. Make sure to remove all old staples.
Step 2: Cutting Your New Fabric and Piping
Now it’s time for your fresh materials. Use the old fabric pieces as a template for your new fabric. Add about an inch or two extra all around for a good seam allowance. Cut your new piping to the exact lengths needed for each edge of your cushion. If you’re making your own, do this now.
Step 3: Attaching the Piping
This is where the magic starts to happen. Pin the piping all around the edge of your cushion. The raw edge of the piping fabric should line up with the raw edge of the cushion fabric. The cord side should face inward. Stitch it in place using a zipper foot or a piping foot on your sewing machine. This foot allows you to get very close to the cord.
Step 4: Adding the New Upholstery Fabric
Lay your new upholstery fabric wrong-side up. Place the cushion on top. Center the cushion. Fold the fabric edges over the cushion. Start stapling at the center of one edge. Pull the fabric taut as you go. Work your way out to the corners. Smooth out any wrinkles. This step requires a bit of finesse. You want the fabric to be smooth and tight.
Step 5: Finishing Touches
Once the fabric is securely stapled, trim any excess fabric. You can cover the raw staples with gimp or a decorative trim for an extra-professional look. Reattach the seat to the chair frame. Stand back and admire your work! You’ve just transformed your dining chairs.
Quick Checklist for Success
Here’s a quick reminder of the key steps to keep you on track:
- Remove all old staples and fabric.
- Cut new fabric with generous seam allowance.
- Cut piping to fit cushion edges.
- Stitch piping to cushion first.
- Pull new fabric taut and staple securely.
- Trim excess fabric and attach cushion.
Conclusion
You’ve learned that reupholstering your dining room chairs with piping is totally achievable! Adding welting cord gives your chairs a professional, custom finish that can transform your dining space. It’s a rewarding DIY project that allows you to personalize your decor and potentially save money compared to buying new. You now have the knowledge to select supplies, prepare your chairs, and attach new fabric with beautiful piping.
Don’t let the thought of upholstery intimidate you. Start with one chair if you’re feeling cautious. You’ll be surprised at what you can accomplish with a little patience and the right tools. Go ahead and give your dining chairs a stylish new look!
Frequently Asked Questions
What type of fabric is best for dining chair upholstery with piping?
For dining chairs, you want fabrics that are durable and easy to clean. Performance fabrics, cotton blends, or even vinyl are great choices. Consider how much wear and tear your chairs get. You’ll want a material that can withstand daily use and spills.
How do I measure for piping cord?
Measure the exact length of each edge of your chair cushion where you plan to add piping. Add a few extra inches for overlap when joining the ends. This ensures you have enough cord to go all the way around your cushion without running short.
Can I use pre-made piping instead of making my own?
Yes, absolutely! Pre-made piping is widely available at fabric stores and online. It’s a convenient option if you want to save time or if making your own feels daunting. Just be sure to choose a thickness that complements your chair’s scale and style.
What is the best way to attach piping so it looks neat?
Using a zipper foot or a dedicated piping foot on your sewing machine is key. These special feet allow you to stitch very close to the piping cord. This ensures the piping lays flat and looks crisp against the cushion fabric.
How do I handle corners when attaching piping?
For neat corners, you can either create a mitered fold in the piping fabric or clip the seam allowance of the piping fabric. For mitered corners, you’ll fold the piping back on itself at the corner to create a clean angle before sewing. Clipping allows the fabric to lay flatter.



![7 Best Comfortable Dining Chairs [2026]](https://seatvit.com/wp-content/uploads/2026/07/7-best-comfortable-dining-chairs-2026-featured-768x432.jpg)
