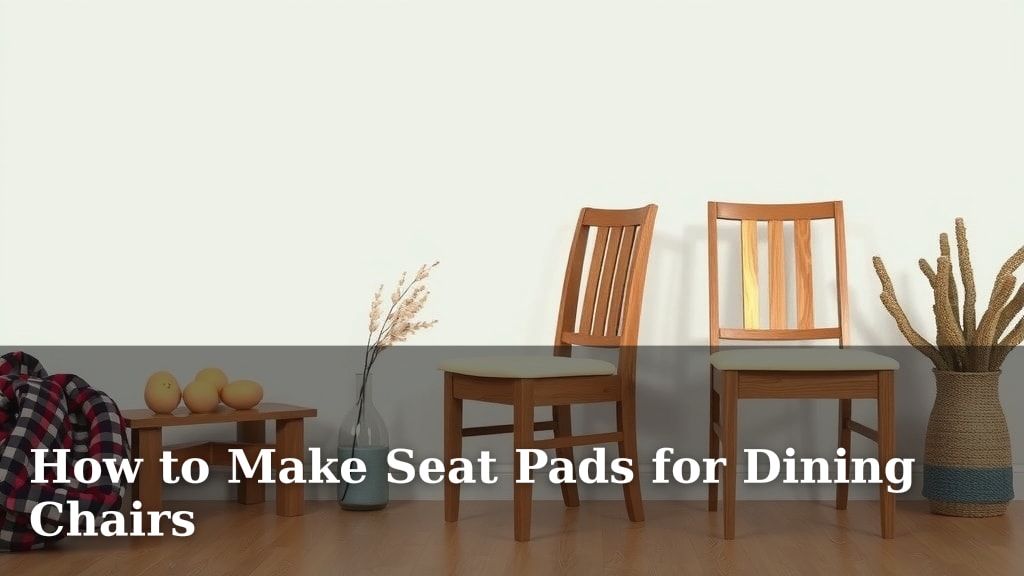
How to Make Seat Pads for Dining Chairs
Making your own seat pads for dining chairs is a wonderfully achievable DIY project. You can easily add a touch of custom comfort and style to your home without breaking the bank. Many crafters find this a rewarding way to update their dining space.
Creating custom seat pads means you get to choose the exact fabric, color, and thickness that perfectly matches your decor. It’s a fantastic way to give old chairs a fresh, new look. You can even make them reversible for extra versatility.
- Choose your favorite fabric.
- Select comfortable filling material.
- Measure your chair seats accurately.
- Sew them up with a few simple stitches.
- Enjoy your beautiful, new chair pads!
Ready to transform your dining chairs? Let’s walk through exactly how to make these seat pads step by step.
“`htmlCreating Your Custom Dining Chair Seat Pads
You’re ready to tackle this fun project! Making your own seat pads is easier than you might think. We’ll guide you through each step. Let’s get your dining chairs looking and feeling fantastic.
Gathering Your Supplies: What You’ll Need
Before you start cutting and sewing, gather everything you need. Having all your materials ready makes the process smooth. Think of it like prepping for a great recipe!
Choosing the Right Fabric
The fabric sets the whole tone for your seat pads. You have so many options! Consider durability, washability, and of course, your personal style. For dining chairs, a sturdy fabric like cotton canvas, a heavy-duty upholstery fabric, or even a durable outdoor fabric can be a great choice. Many experts recommend fabrics that can withstand frequent use and easy cleaning (The Spruce).
Think about the pattern and color, too. Do you want something bold to make a statement? Or a subtle pattern that blends with your existing decor? You can even find fabrics with fun textures.
Selecting Your Padding Material
Comfort is key, right? The filling for your seat pads will determine how plush they feel. Common choices include polyester fiberfill, foam batting, or even repurposed materials like old blankets or towels.
For a good balance of softness and support, polyester fiberfill is a popular option. It’s widely available and easy to work with. If you prefer a firmer feel, consider using upholstery foam. You can often find this at craft stores or fabric shops. Many crafters find that layering a bit of fiberfill over foam adds an extra touch of comfort.
Essential Tools for the Job
Beyond fabric and filling, you’ll need a few basic sewing tools. Make sure you have:
- A good pair of fabric scissors.
- A measuring tape or ruler.
- Fabric pins.
- Matching thread.
- A sewing machine (though hand-sewing is also an option!).
- An iron and ironing board.
Measuring and Cutting Your Fabric
Accurate measurements are your best friend here. This step ensures your pads fit your chairs perfectly. Don’t guess – measure twice, cut once!
Measuring Your Chair Seats
Most dining chair seats are somewhat square or rectangular. Measure the width and depth of your chair seat. Add about 1 inch to each measurement for seam allowance. This extra inch will be used to sew the pieces together.
If your chair seats have rounded corners, you’ll need to measure those curves too. You can trace the shape of your chair seat onto paper to create a template. This is especially helpful for unique chair shapes.
Cutting the Fabric Pieces
For each seat pad, you’ll typically need two pieces of fabric. These will be the top and bottom of your cushion. Cut two identical shapes based on your measurements. Remember to add that 1-inch seam allowance all around.
If you’re adding ties to secure the pads, cut those strips now as well. Usually, four ties per pad are sufficient – two for the front and two for the back. These ties should be about 18 inches long and 2 inches wide.
Preparing Your Padding
Your padding should be cut to the same size as your main fabric pieces, but *without* the seam allowance. If you’re using multiple layers of fiberfill, you might want to shape them slightly. This helps avoid a lumpy look.
For foam, simply cut it to the size of the chair seat. If you’re using fiberfill, you can create a simple bag or envelope for it using a thin layer of batting. This helps keep the fiberfill from shifting.
Sewing Your Seat Pads Together
Now for the fun part – bringing it all together! This is where your seat pad starts to take shape.
Assembling the Pad
Place your two fabric pieces right sides together. This means the pretty sides of the fabric should be facing each other. Pin them securely around the edges to prevent shifting while you sew. Make sure your padding is sandwiched neatly between the fabric layers.
If you’re adding ties, now is the time to attach them. Fold each tie in half lengthwise, then in half again to create a narrow strip. Tuck the raw ends of the ties between the fabric layers, about 2-3 inches in from each corner. Ensure the loop of the tie is pointing inwards towards the center of the pad.
Stitching the Edges
Using your sewing machine or needle and thread, stitch all the way around the pinned edges. Leave a gap of about 4-6 inches unsewn. This opening is crucial – it’s how you’ll turn the pad right-side out and insert your padding.
Many guides suggest using a straight stitch with a medium stitch length. A stitch width of about 1/2 inch is common. This allows for the seam allowance you added earlier. Once stitched, trim the corners diagonally, being careful not to cut the stitching. This helps create sharper corners.
Turning and Stuffing
Carefully reach through the opening you left and pull the fabric right-side out. Use a blunt tool, like a chopstick or the eraser end of a pencil, to gently push out the corners so they are nice and crisp. Now, admire your nearly finished cushion!
Insert your prepared padding through the opening. If you’re using fiberfill, stuff it in evenly. Try to fill out the corners and edges so the pad looks plump. If you’re using foam, slide it in carefully. You want a snug fit.
Closing the Opening
Once your padding is in place and the pad looks nicely filled, it’s time to close the opening. You can do this by hand using a slip stitch, also known as a blind stitch. This stitch is nearly invisible and gives a very neat finish. Fold the raw edges of the opening inward so they are even with the sewn seam, then stitch them together.
Finishing Touches and Care
You’re almost there! A few final steps will make your seat pads even better.
Pressing Your Pads
Once everything is sewn up, give your seat pads a good press with your iron. This will help them look professionally made. Be sure to check the fabric care instructions for your chosen material to ensure you’re using the correct heat setting.
Attaching Ties (If Applicable)
If you didn’t attach your ties during the initial sewing, you can sew them on now. Position them on the underside of the pad where they will best secure to your chair. Use a strong stitch to ensure they hold up to regular use.
Caring for Your New Seat Pads
Regular care will keep your seat pads looking fresh and new. Most fabrics can be spot cleaned with mild soap and water. For a deeper clean, check the fabric’s care label. Many upholstery fabrics can be gently vacuumed to remove dust and crumbs.
If spills happen, act fast! Blotting the spill immediately rather than rubbing is often recommended by cleaning experts (Good Housekeeping). This prevents the stain from setting deeper into the fabric.
“`Conclusion
You’ve learned how to create custom dining chair seat pads that add comfort and style to your home. You can select the perfect fabrics and padding to match your decor. Sewing your own seat pads is a rewarding DIY project. It’s an excellent way to update your dining space affordably. Now, take your measurements and get ready to sew your beautiful new seat pads!
Frequently Asked Questions
How do I make sure my seat pads are comfortable?
Choose a padding material that offers the right blend of softness and support for your preference. Polyester fiberfill is a popular choice for plush comfort, while upholstery foam provides firmer support. You can even layer them for a custom feel.
Can I make seat pads for chairs that aren’t square?
Absolutely! For chairs with rounded or uniquely shaped seats, creating a paper template first is key. Trace your chair’s exact shape onto paper, then use that template to cut your fabric and padding precisely.
What’s the best way to attach ties so the pads stay put?
To ensure your pads stay secure, attach the ties using a strong stitch during the initial sewing process. Position them on the underside of the pad, about 2-3 inches in from each corner, where they can best wrap around your chair legs.
How should I clean my homemade seat pads?
Regular cleaning involves gently vacuuming to remove dust. For spills, blot them immediately with a clean cloth. Always check your fabric’s care label for specific washing or spot-cleaning instructions to avoid damage.
Is it difficult to sew the opening closed neatly?
Closing the opening by hand with a slip stitch, also known as a blind stitch, creates a nearly invisible and professional finish. Fold the raw edges inward before stitching to ensure a clean seam.