
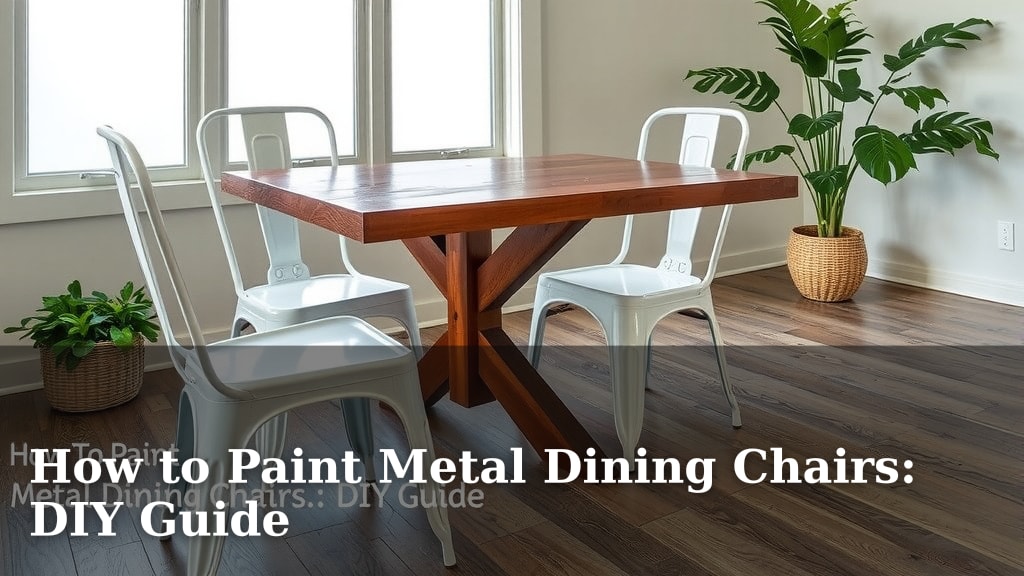
How to Paint Metal Dining Chairs: DIY Guide
Yes, you can absolutely paint your metal dining chairs yourself! It’s a fantastic way to refresh your dining room on a budget. With a few basic supplies and a little patience, you can achieve a professional-looking finish that transforms your space. Don’t let those dated chairs hold your style back any longer!
Repainting metal chairs is more than just a DIY project. It’s a chance to add personal flair to your home. You can match them to your existing decor or go for a bold, new look. This guide will help you pick the right paint and prep your chairs for a durable, beautiful result.
- Prep is key for a smooth finish.
- Use the right primer for metal.
- Spray paint offers easy coverage.
- Allow ample drying time between coats.
- Seal your work for lasting beauty.
Ready to give your dining chairs a makeover? Let’s walk through the simple steps to painting your metal dining chairs, transforming them from drab to fab!
Giving Your Metal Dining Chairs a Fresh Coat: A DIY Makeover
You’ve decided your metal dining chairs need a facelift. That’s a fantastic idea! Painting them yourself is a rewarding project. You can save money and create a custom look. We’ll guide you through each step. You’ll get a beautiful, lasting finish. Let’s get those chairs looking brand new!
Choosing the Right Paint for Your Metal Chairs
Selecting the correct paint is vital for a durable finish. You want paint that adheres well to metal. It should also withstand daily use. We’ve found that specialty metal paints work best. They offer better adhesion and chip resistance.
Types of Paint to Consider
There are a few main paint types you can use. Each has its pros and cons. Understanding these will help you make the best choice for your project.
Spray Paint for Metal
Spray paint is often the go-to for metal furniture. It provides a smooth, even coat. Application is generally quick and easy. Many spray paints are designed specifically for metal. They often include a primer, which can save you a step. Look for terms like “direct to metal” or “rust-inhibiting” on the can.
Brush-On or Roller Paint
You can also use traditional brush-on or roller paints. These are good if you want a very specific color. You might find a wider color selection. Oil-based enamel paints are durable for metal. Water-based acrylics can also work if properly primed. These methods might take a bit longer to apply evenly.
Paint and Primer in One
Many paints now offer a “paint and primer in one” formula. For metal, it’s still a good idea to use a separate primer. Metal surfaces can be tricky. A dedicated primer ensures the best adhesion. It prevents rust and creates a uniform base for your color coat.
Gathering Your Painting Supplies
Before you begin, gather all your supplies. Having everything ready makes the process much smoother. It prevents interruptions and ensures you don’t forget anything important.
- Drop cloths or old newspapers
- Degreaser or soap and water
- Scrub brush or sponge
- Sandpaper (medium and fine grit)
- Tack cloths
- Metal primer
- Your chosen metal paint
- Spray paint can handle or brush/roller
- Gloves and a mask
- Optional: Clear sealant or topcoat
Prepping Your Metal Chairs: The Most Important Step
Proper preparation is key to a professional finish. Skipping this step can lead to paint peeling or a rough surface. Think of it like building a house; you need a solid foundation!
Cleaning the Chairs Thoroughly
Start by cleaning your chairs. Remove all dirt, grease, and grime. A good degreaser works wonders. You can also use warm, soapy water. Scrub all surfaces well. Rinse them thoroughly and let them dry completely. Many experts recommend a deep clean for good adhesion (Mayo Clinic).
Sanding for Smoothness and Adhesion
Next, you’ll need to sand the chairs. Use medium-grit sandpaper first. This scuffs up the surface. It helps the primer and paint stick better. Don’t press too hard; you’re not trying to remove all the old paint. You just want to create a slightly rough surface. After the medium grit, go over everything with fine-grit sandpaper. This smooths out any scratches from the medium grit.
Wiping Away Dust
After sanding, wipe down the chairs with a tack cloth. This removes all the fine dust particles. You want a perfectly clean surface before priming. Any dust left behind will show up in your finished paint job.
Priming Your Metal Dining Chairs
Primer is essential for metal surfaces. It creates a uniform base. It also helps prevent rust from forming later. Choose a primer specifically designed for metal. Many come in spray cans, which makes application easy.
Applying the Primer Coat
If you’re using spray primer, hold the can about 10-12 inches away. Apply in light, even coats. Work in a well-ventilated area. Overlapping strokes ensure complete coverage. Let the primer dry completely according to the manufacturer’s instructions. This usually takes at least 30 minutes to an hour. You might need a second coat for full coverage.

Painting Your Metal Chairs: Achieving a Flawless Finish
Now for the fun part – applying your color! Whether you use spray paint or brush-on, technique matters.
Spray Painting Technique
For spray paint, use the same technique as with the primer. Keep the can moving at a consistent speed. Overlap your strokes slightly. Apply in thin, even coats. Trying to cover everything in one thick coat will lead to drips. Patience is your best friend here. Allow adequate drying time between each coat.
Brush or Roller Application
If brushing or rolling, use smooth, even strokes. Avoid overworking the paint. For intricate areas, a small artist’s brush can be helpful. Again, apply thin coats. This ensures a smooth, professional look without brush marks.
Drying and Curing Time
Don’t rush the drying process! The paint needs time to dry between coats. This is called “flash-off time.” Then, allow the final coat to dry thoroughly. Curing is different from drying. Curing means the paint reaches its maximum hardness. This can take several days, even up to a week. Be gentle with your chairs during this time.
Protecting Your Newly Painted Chairs
To make your paint job last, consider a topcoat. A clear sealant protects the paint. It adds durability and a beautiful finish.
Applying a Clear Sealant
Use a spray sealant designed for metal or multi-surface use. Apply it in thin, even coats, just like the paint. Let it dry completely. A glossy finish will add shine. A matte finish will give a more subdued look. This step truly seals the deal for a long-lasting makeover.
Your Painting Checklist: Quick Recap
Here’s a handy checklist to keep you on track:
- Clean and degrease chairs thoroughly.
- Lightly sand for adhesion.
- Wipe away all dust with a tack cloth.
- Apply a thin, even coat of metal primer.
- Apply thin, even coats of your chosen paint.
- Allow ample drying and curing time.
Conclusion
You’ve learned that painting your metal dining chairs is totally doable! Following these steps – from thorough cleaning and sanding to priming and applying thin coats of paint – will give you beautiful, lasting results. Don’t forget that essential drying and curing time!
Take that first step today and start gathering your supplies. Your dining room is about to get a whole lot more stylish. Your refreshed chairs will be a source of pride. Enjoy your DIY success!
Frequently Asked Questions
Can I paint my metal chairs without sanding?
While you can skip light sanding, it’s highly recommended for best results. Sanding scuffs the surface, creating better adhesion for your primer and paint. Skipping this step increases the risk of your paint chipping or peeling later.
What’s the best type of paint for metal chairs that get a lot of use?
For chairs that see a lot of action, a high-quality spray paint specifically designed for metal is often your best bet. Look for formulas labeled “direct to metal” or “rust-inhibiting.” Adding a clear sealant topcoat will also add extra durability.
How long should I wait between paint coats?
Always check the paint manufacturer’s instructions for specific drying times. Generally, you’ll want to wait at least 30 minutes to an hour between spray paint coats for “flash-off” time. This allows solvents to evaporate and prevents drips or uneven finishes.
Do I really need a separate primer for metal chairs?
Yes, a dedicated metal primer is very important. Even if your paint says “primer in one,” a separate primer provides a more robust base for adhesion and offers better protection against rust. It ensures your final color coat looks uniform.
How can I prevent spray paint drips on my chairs?
Drips usually happen when paint is applied too thickly or too close to the surface. Keep your spray can moving at a consistent speed, about 10-12 inches from the chair. Apply paint in thin, even coats, allowing each to dry slightly before applying the next.



![7 Best Inexpensive Dining Chairs [2026]](https://seatvit.com/wp-content/uploads/2026/06/7-best-inexpensive-dining-chairs-2026-featured-768x432.jpg)