How to Refinish a Dining Table and Chairs
You can absolutely refinish your dining table and chairs to give them a fresh, new look. It’s a great way to update your home without buying entirely new furniture. With some effort, you can make your old set look brand new again.
Refinishing involves removing the old finish and applying a new one. This process can dramatically change the style and color of your furniture. It’s a rewarding DIY project that many homeowners have successfully tackled, breathing new life into worn pieces.
- Prep is key: Sanding is essential for a smooth finish.
- Choose your finish: Stain, paint, or a clear coat all offer different looks.
- Apply carefully: Even coats lead to professional-looking results.
- Sealing is vital: Protect your hard work with a durable topcoat.
- Patience pays off: Allow proper drying time between steps.
Let’s walk through exactly how to refinish your dining table and chairs step by step, from start to a beautiful finish.
Giving Your Dining Set a New Life: Refinishing Tips
Refinishing your dining table and chairs can transform your space. It’s a smart way to refresh your home without a big expense. You can make an old set look brand new. It just takes some planning and elbow grease. We’ll guide you through the entire process.
Step 1: Gather Your Supplies and Prepare Your Workspace
Before you start, make sure you have all the right tools. This will make the project much smoother. You’ll need sandpaper in various grits. Also, grab a good stripper or degreaser. You’ll want a quality stain or paint. Don’t forget a good topcoat for protection. Safety gear is a must: gloves, mask, and eye protection. Find a well-ventilated area for your work. A garage or outdoors is ideal. Lay down drop cloths to protect the floor.
Essential Tools and Materials Checklist
- Sandpaper (80, 120, 220 grits)
- Chemical stripper (optional, for tough finishes)
- Scrapers (putty knife, Bondo spreader)
- Mineral spirits or denatured alcohol
- Rags or shop towels
- Gloves (chemical-resistant)
- Respirator mask
- Safety glasses
- Paint stripper (if needed)
- Wood filler (for repairs)
- Primer (if painting)
- Wood stain or paint
- Brushes, foam applicators, or rags
- Polyurethane, varnish, or lacquer
- Fine-grit sandpaper (320 or higher) for between coats
Step 2: Prepping the Furniture for a Flawless Finish
Proper preparation is the secret to a beautiful refinish. This step involves cleaning and sanding. It removes old finishes and imperfections. A smooth surface is key for the new finish to adhere well. You want the final result to look professional, not DIY.
Cleaning Away Grime and Grease
Start by cleaning your furniture thoroughly. Use a mild soap and water solution. You can also use a degreaser. This removes any surface dirt, grease, or old wax. Let the furniture dry completely. Inspect for any loose veneer or wobbly parts. Repair these now before you start sanding.
The Sanding Process: From Rough to Smooth
Sanding is critical for removing the old finish. It also creates a surface for the new finish to grip. You’ll start with a coarser grit and move to finer ones. Begin with 80-grit sandpaper for tough finishes. For most tables, 120-grit is a good starting point. Work your way up to 220-grit sandpaper. Sand with the grain of the wood. This prevents unsightly scratches. Power sanders can speed this up. However, always finish by hand in tricky spots.
Sanding Tips for the Best Results
Don’t rush the sanding. It’s better to sand too much than not enough. After sanding with 220-grit, wipe down the furniture. Use a tack cloth or a damp rag. This removes all the dust. Dust is your enemy at this stage. It can ruin the new finish. If you’re using a chemical stripper, follow the product instructions carefully. Many experts advise testing strippers in an inconspicuous area first (Consumer Product Safety Commission).
Step 3: Choosing and Applying Your New Finish
Now comes the fun part: choosing how you want your furniture to look. You have several options. Stain can bring out the wood’s natural beauty. Paint offers a complete color change. A clear coat protects the wood without altering its color much.
Staining Your Dining Set
Wood stain comes in many colors. It penetrates the wood to add color. Always test the stain on a scrap piece of wood first. This ensures you like the color. Apply the stain with a brush or rag. Wipe off the excess after a few minutes. This controls the depth of the color. Multiple coats can deepen the hue. Allow each coat to dry fully. Many woodworkers suggest wiping off stain evenly for consistent color (National Woodworking Magazine).
Painting Your Table and Chairs
Painting offers a bold new look. You can choose any color you desire. First, apply a good quality primer. Primer helps the paint adhere better. It also blocks stains from the old finish. Let the primer dry completely. Then, apply thin, even coats of paint. Avoid thick, gloppy coats. They tend to drip and look amateurish. Two to three thin coats are usually best. Lightly sand between coats with very fine sandpaper (320-grit or higher). This creates a super smooth surface.
Using a Clear Coat Finish
A clear coat, like polyurethane or varnish, protects the wood. It can be matte, satin, or glossy. Apply it over stain or bare wood. Like paint, apply in thin, even coats. Avoid brush strokes. A foam applicator can give a smoother finish. Light sanding between coats is recommended. This helps each layer bond well.
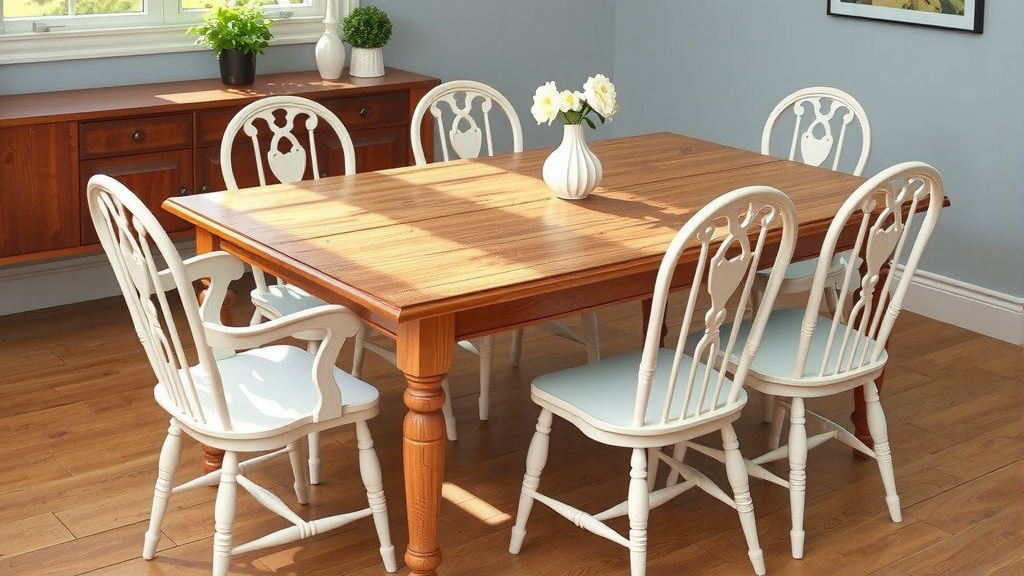
Step 4: Protecting Your Refinished Masterpiece
A durable topcoat is essential. It protects your beautiful new finish. It shields it from spills, scratches, and wear. Polyurethane is a popular choice. It’s tough and widely available. Varnish is another good option. Lacquer dries faster but is less durable. Always check the product’s recommendations for drying times.
Applying Multiple Topcoats
Apply at least two to three coats of your chosen topcoat. This provides maximum protection. Let each coat dry thoroughly. This can take several hours or even overnight. Lightly sand with very fine grit sandpaper (400-grit or higher) between coats. This smooths out any imperfections. Wipe away dust with a tack cloth after sanding. The final coat should be left to cure for a few days. This means it hardens completely.
A Quick Refinishing Checklist
- Gather all your supplies before you begin.
- Clean your furniture thoroughly.
- Sand the old finish off completely.
- Wipe away all dust meticulously.
- Apply your chosen stain, paint, or clear coat in thin layers.
- Apply at least two to three protective topcoats.
Conclusion
You’ve learned how to transform your old dining set into a stunning centerpiece. Remember, proper preparation is key to a professional-looking finish. Sanding thoroughly and cleaning meticulously lay the foundation for success. Whether you choose to stain, paint, or use a clear coat, applying thin, even layers is essential. Don’t forget those crucial protective topcoats. Your refinished dining table and chairs will be a source of pride. Now, take that first step and gather your supplies to start your project!
Frequently Asked Questions
How long does it take to refinish a dining table and chairs?
The total time can vary greatly depending on the furniture’s condition and your chosen finish. Most projects take anywhere from a weekend to a full week. This includes drying times between coats and curing time for the final finish.
Can I refinish over an existing finish without sanding everything off?
For most finishes, thorough sanding is necessary for the new finish to adhere properly. If you’re applying a similar type of finish, a light scuff-sand might suffice. However, removing the old finish completely usually yields the best results.
What’s the best way to remove old paint or a thick varnish?
A chemical stripper can be very effective for tough finishes. Always wear gloves and a respirator mask when using these products. Follow the manufacturer’s instructions carefully, and be sure to work in a well-ventilated area.
How can I ensure my painted finish doesn’t look streaky?
Use a high-quality primer and apply paint in thin, even coats. A good synthetic brush or a foam roller can help create a smooth surface. Lightly sanding between coats with very fine grit sandpaper will also minimize streaks.
How long should I wait before using my refinished table?
While your finish might feel dry to the touch within hours, it needs time to cure for maximum durability. Allow at least 3-7 days before placing heavy items or using the table regularly. This curing process hardens the topcoat against scratches and wear.