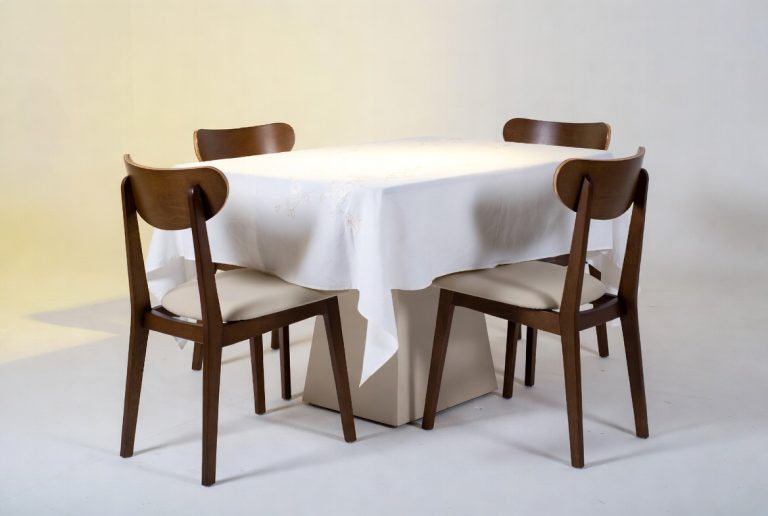
How to Make Dining Table Chairs: DIY Guide
Yes, you can absolutely make your own dining table chairs with a DIY approach. It’s a rewarding project that lets you customize the style and save money. You’ll be surprised how achievable it is with the right guidance and materials. We’ll show you how to build stylish and sturdy chairs that fit your dining space perfectly, from choosing wood to final assembly. DIY dining chairs can be a fantastic addition to your home, offering both function and a personal touch. Building them yourself means you control the design and the quality.
Creating your own furniture can feel like a big undertaking, but making dining chairs is more accessible than you might think. This project involves basic woodworking skills and common tools. Many people find that the process of selecting wood, cutting pieces, and assembling the chair is incredibly satisfying. You get to be hands-on with a piece of furniture that will be used daily. This guide will help you navigate the process, ensuring you create durable and attractive chairs you’ll be proud of. It’s a chance to bring your unique vision to life.
- Understand basic DIY woodworking.
- Gather necessary tools and materials.
- Follow step-by-step instructions for building.
- Learn about finishing and upholstery options.
- Achieve custom dining chairs on a budget.
Ready to roll up your sleeves? Let’s get into the nitty-gritty of how to make your own dining table chairs. We’ve broken down the entire process into easy-to-follow steps.
Building Your Own Dining Chairs: A DIY Approach
So, you’re ready to tackle building your own dining chairs? That’s fantastic! It’s a project that truly lets you personalize your dining space. We’ll guide you through the essential steps to create chairs that are not only stylish but also built to last. You’ll be amazed at what you can accomplish with a bit of planning and patience.
Planning Your Chair Design
Before you even think about cutting wood, let’s talk design. What kind of chairs are you envisioning? Do you want something modern and minimalist, or perhaps a more traditional, robust style? Your design will heavily influence the materials and tools you’ll need.
Consider Your Dining Table
The height and style of your dining table are key factors. Your chairs need to complement the table, not compete with it. Measure the distance from the floor to the underside of your table. A good rule of thumb is to have about 10-12 inches of clearance between the tabletop and the chair seat. This ensures you can comfortably sit and tuck the chairs in when not in use (National Kitchen & Bath Association).
Sketching Your Vision
Grab a pencil and paper. It doesn’t need to be a masterpiece. Simple sketches will help you visualize proportions and features. Think about the backrest height and angle, seat depth, and whether you want armrests. This is where you make the chair truly yours.
Gathering Your Tools and Materials
With a design in mind, it’s time to think about what you’ll need. Having everything ready before you start will make the building process much smoother. Think of it like preparing all your ingredients before you start cooking!
Essential Tools You’ll Need
- Measuring tape for accurate cuts.
- Pencil for marking your wood.
- Safety glasses to protect your eyes – always!
- Saw (a circular saw or miter saw makes things easier).
- Drill/driver with various bits for screws and pilot holes.
- Sander (orbital or belt sander) for a smooth finish.
- Clamps to hold pieces together while glue dries.
- Screwdriver bits that match your screws.
Choosing the Right Wood
The type of wood you choose will impact the look, durability, and cost of your chairs. Hardwoods like oak, maple, or walnut are excellent choices for their strength and beautiful grain. They will stand up to daily use for years. Pine is a more affordable and lighter option, though it’s softer and can dent more easily. Many DIYers find pine to be a great starting point for projects like this.
Hardware and Supplies
You’ll need wood screws, wood glue, and sandpaper. Consider the type of finish you want, like paint, stain, or a clear protective coat. If you plan on upholstery, you’ll need fabric, batting, and a staple gun.
Step-by-Step Chair Construction
Now for the fun part – bringing your design to life! We’ll break this down into manageable steps. Remember to measure twice and cut once. It’s a classic woodworking saying for a reason!
Cutting Your Pieces
Based on your sketches and measurements, carefully cut all your wooden pieces. This typically includes legs, seat supports, backrest components, and any stretchers for stability. Precision here is important for a sturdy chair. It’s often helpful to create a cut list and label each piece as you go.
Assembling the Chair Frame
Start by building the base frame. Attach the legs to the seat support rails. Use a good quality wood glue for strong joints. Then, reinforce these connections with screws. Pre-drilling pilot holes will prevent the wood from splitting, especially near the ends of the boards. Use clamps to hold everything securely while the glue sets. Many experts recommend letting the glue cure for at least 24 hours for maximum strength (Woodworking Guild of America).
Adding the Backrest
Assemble the backrest pieces separately if your design is complex. Then, attach the backrest assembly to the rear legs of the chair frame. Again, use wood glue and screws for a solid connection. Ensure the backrest is at a comfortable angle. Test it out to make sure it feels supportive.
Reinforcing for Strength
Consider adding stretchers between the legs, especially for the front legs and potentially across the back. These not only add stability but can also enhance the visual appeal of the chair. They distribute weight and reduce stress on the joints. This is a key step for ensuring your chairs can handle regular use.
Finishing and Upholstery Touches
Once the main structure is built and the glue is dry, it’s time to make your chairs look polished and feel comfortable.
Sanding for a Smooth Finish
Thorough sanding is essential for a professional look and feel. Start with a coarser grit sandpaper (like 80 or 100 grit) to smooth out any rough spots or saw marks. Then, move to finer grits (150, then 220 grit) for a silky smooth surface. Wipe away all dust between grits. Your hands should glide effortlessly over the wood.
Applying Your Chosen Finish
This is where your chair really starts to shine! You can paint them, stain them to highlight the wood grain, or apply a clear protective finish. Always apply finishes in a well-ventilated area and follow the manufacturer’s instructions. Multiple thin coats are usually better than one thick one. Allow adequate drying time between coats.
Optional: Upholstering the Seat
If you want extra comfort, upholstery is a great addition. You’ll typically need a piece of plywood or MDF for the seat base, foam padding, and your chosen fabric. Cut the foam to size and adhere it to the seat base. Then, stretch your fabric tightly over the foam and seat base, securing it underneath with a staple gun. Many DIYers find this part surprisingly fun and rewarding.
Here’s a quick checklist to keep you on track:
- Finalize your chair design and measurements.
- Gather all necessary tools and materials.
- Cut all wood pieces accurately.
- Assemble the chair frame securely.
- Attach the backrest and any stretchers.
- Sand the entire chair until smooth.
- Apply your desired finish.
- Add upholstery if planned.
Conclusion
You’ve now got a clear roadmap to build your own dining chairs. We’ve covered everything from sketching your initial design to the final sanding and finishing touches. Remember, careful planning and patient assembly lead to a sturdy, beautiful chair you’ll be proud of. You have the knowledge to create custom furniture that perfectly matches your style and budget. Your next step is to grab your tape measure, pick your wood, and start cutting those first pieces!
Frequently Asked Questions
What kind of wood is best for DIY dining chairs?
For durability, hardwoods like oak or maple are excellent choices. They resist wear and tear from daily use. If budget is a concern, pine is a softer but more affordable option. Many DIYers find pine works well for their first chair projects.
How much clearance do I need between the chair seat and the table?
A good rule of thumb is to have about 10 to 12 inches of space between the tabletop and the chair seat. This ensures comfortable seating and allows you to tuck chairs neatly under the table. Measure your table before you start designing.
Is it cheaper to make dining chairs than to buy them?
Often, yes, especially if you plan to buy higher-quality or custom-designed chairs. While you’ll invest in materials and tools, the cost per chair can be significantly lower. You also gain the satisfaction of building them yourself.
How can I make my DIY chairs stronger?
Use strong wood glue and screws for all joints. Pre-drilling pilot holes is essential to prevent wood splitting. Adding stretchers between the legs provides extra stability. Let wood glue fully cure, ideally 24 hours, before putting weight on the chairs.
What if I don’t have many woodworking tools?
You can start with a few essential tools like a measuring tape, pencil, saw, drill/driver, and clamps. Many furniture stores or online retailers sell pre-cut wood pieces for certain projects. Consider borrowing or renting specialized tools like a miter saw if needed.