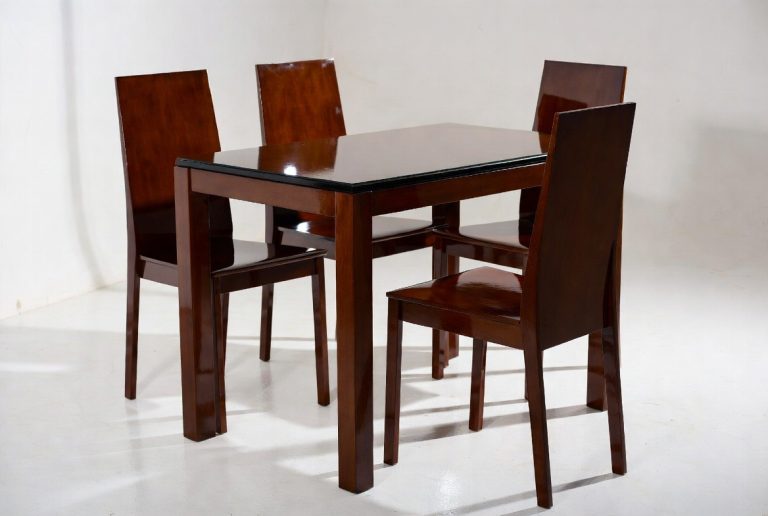
How to Refinish Dining Room Chairs: Guide
Yes, you can absolutely refinish your dining room chairs yourself! It’s a fantastic way to update your dining space without buying new furniture. With a little patience and some basic supplies, you can give your chairs a whole new look and feel, transforming them from tired and dated to fresh and fabulous.
Refinishing furniture can be a rewarding DIY project. Many homeowners find it surprisingly achievable. You’ll be able to choose your own color and finish, matching your chairs perfectly to your existing decor. Plus, it’s a great way to save money and feel good about updating your home.
- Prep is key for a smooth finish.
- Sanding removes old paint or varnish.
- Choose the right paint or stain for your look.
- Sealing protects your hard work.
- Don’t rush the drying times!
Ready to give those chairs the glow-up they deserve? Let’s walk through exactly how to refinish your dining room chairs step by step, so you can enjoy a beautifully updated dining area.
Your Guide to Refinishing Dining Room Chairs
Ready to give those dining room chairs a fresh start? Refinishing them yourself is a rewarding project. You can completely change their look without buying new ones. This guide will walk you through each step. You’ll learn how to prep, sand, paint or stain, and seal your chairs for a beautiful, lasting finish. Get ready to transform your dining area!
Step 1: Gathering Your Supplies
Before you dive in, let’s make sure you have everything you need. Having all your supplies ready makes the process much smoother. You’ll want to protect your workspace, so grab some drop cloths or old newspapers. A good set of tools will make your job easier.
Essential Tools and Materials
You’ll need a few key items. For cleaning, a mild soap and water mixture is usually sufficient. If there’s stubborn grime, a de-glosser can help. For sanding, you’ll want sandpaper in a few different grits: coarse (like 80-100 grit) for heavy removal, medium (120-150 grit) for smoothing, and fine (220 grit) for a super-smooth finish. Don’t forget a sanding block or an electric orbital sander for larger areas.
For applying your finish, you’ll need brushes, rollers, or foam applicators. The type depends on whether you’re painting or staining. If you’re painting, a good quality latex or enamel paint is recommended. For staining, wood stain is your go-to. Finally, a clear topcoat like polyurethane or polycrylic will protect your hard work. You’ll also need rags for wiping away excess stain or dust.
Safety First!
Safety is super important when working with finishes. Always work in a well-ventilated area. Open windows or work outdoors if possible. Wear safety glasses to protect your eyes from dust and fumes. Gloves will keep your hands clean and protected. If you’re sanding a lot, a dust mask is a good idea to avoid inhaling fine particles.
Step 2: Preparing Your Chairs for Refinishing
This is where the magic really begins. Proper preparation is key to a professional-looking finish. Skipping these steps can lead to a less-than-ideal result. Think of it like prepping a canvas before painting; it makes all the difference.
Cleaning Your Chairs Thoroughly
Start by giving your chairs a good cleaning. Use a soft cloth with a solution of mild soap and water. Gently wipe down all surfaces to remove dirt, grease, and grime. Pay attention to crevices where dust and food particles can hide. For tougher spots, a de-glosser can help break down old finishes and dirt. After cleaning, let the chairs dry completely. This ensures you’re starting with a clean slate.
Sanding for a Smooth Surface
Sanding is crucial for removing old finishes and creating a surface that new paint or stain can adhere to. Start with a coarser grit sandpaper (around 80-100 grit) to strip away old paint or varnish. Work in the direction of the wood grain. Once the old finish is mostly gone, switch to a medium grit (120-150 grit) to smooth out any rough spots. For a perfectly smooth finish, follow up with a fine grit sandpaper (220 grit). After each sanding stage, wipe away all the dust with a tack cloth or a damp rag. This dust removal step is critical for a smooth application of your new finish.
Sanding Techniques
If your chairs have intricate carvings or details, a sanding sponge or folded sandpaper can help you reach those tight spots. For flat surfaces, an orbital sander can speed things up considerably. Remember, the goal isn’t to remove all the wood, but to create a uniform surface for your new coating. Many experts suggest checking for smoothness by running your hand over the surface – if you feel any bumps, sand them down (Mayo Clinic).
Step 3: Applying Your New Finish
Now for the fun part – giving your chairs a brand-new look! You have two main options: painting or staining. Your choice will depend on the look you want and the type of wood your chairs are made from.
Painting Your Dining Chairs
Painting offers a vibrant, opaque finish. It’s a great way to inject color into your dining space. You can choose anything from bold hues to soft pastels. For best results, apply a coat of primer first. This helps your paint adhere better and provides a uniform base. Then, apply thin, even coats of your chosen paint. Allow each coat to dry completely before applying the next. Two to three coats are usually needed for full coverage. Consider using a paint sprayer for an ultra-smooth finish on delicate pieces.
Staining Your Dining Chairs
Staining enhances the natural beauty of the wood. It allows the wood grain to show through while adding color. Start by applying the stain evenly with a brush or rag, working in the direction of the wood grain. Wipe off any excess stain with a clean cloth after a few minutes. The longer you leave the stain on, the darker the color will be. Allow the stain to dry completely, which can take 24-48 hours depending on humidity and the type of stain. Some people prefer to apply a pre-stain wood conditioner first to ensure even absorption, especially on softer woods like pine.
Choosing the Right Color and Type
When painting, latex or acrylic paints are common choices for furniture. They offer durability and easy cleanup. For staining, oil-based stains penetrate wood deeply and offer a rich color. Water-based stains are quicker to dry and easier to clean up. Research the types of wood your chairs are made from; some woods take stain differently.

Step 4: Sealing and Protecting Your Chairs
Once your paint or stain is completely dry, it’s time to seal it. This step is essential for protecting your newly finished chairs from spills, scratches, and everyday wear and tear. A good sealer will make your chairs last for years to come.
Applying a Protective Topcoat
Polyurethane and polycrylic are popular choices for topcoats. Polycrylic is water-based and has a lower odor, drying to a clear finish. Polyurethane is oil-based and offers superior durability but can have a slight amber tint. Apply thin, even coats, allowing each coat to dry thoroughly according to the manufacturer’s instructions. Lightly sand between coats with very fine-grit sandpaper (320 grit or higher) for an extra-smooth finish. Wipe away dust between coats. Typically, two to three coats of topcoat are recommended for dining chairs.
Allowing Proper Curing Time
This is where patience truly pays off. While your chairs might feel dry to the touch after a day or two, the finish needs time to cure fully. Curing is the process where the finish hardens completely. This can take anywhere from a few days to a few weeks, depending on the product used and environmental conditions. Avoid placing heavy items on the chairs or subjecting them to heavy use during the curing period. Many furniture refinishing guides suggest waiting at least 7 days before regular use (Woodworking Journal).
Quick Checklist for Refinishing Success
- Gather all your tools and supplies beforehand.
- Ensure your workspace is well-ventilated and protected.
- Clean, sand, and dust your chairs thoroughly.
- Apply paint or stain in thin, even coats.
- Apply 2-3 coats of a protective topcoat.
- Allow adequate drying and curing time before use.
Conclusion
You’ve got this! Refinishing your dining room chairs is entirely within your reach. By focusing on thorough preparation, careful sanding, thoughtful application of your chosen finish, and patient sealing, you’re well on your way to a stunning transformation. Your dining area will feel brand new, and you’ll have the satisfaction of a project completed with your own hands. Now that you know the steps, pick a weekend, gather your supplies, and get ready to create beautiful, refreshed chairs you’ll love for years to come.
Frequently Asked Questions
What if my chairs have upholstery?
If your chairs have upholstered seats or backs, you’ll need to remove the fabric and padding before you start sanding and finishing the wood frame. Once the wood is refinished, you can re-upholster the seats with new fabric. This adds an extra layer to the project, but it’s definitely doable with the right tools like a staple gun.
Can I refinish chairs with veneer?
Refinishing veneer requires extra care. If the veneer is peeling or damaged, it can be tricky. You’ll want to use very fine-grit sandpaper and avoid over-sanding, as you can easily go through the thin veneer layer. Be gentle when applying finishes, and consider using a water-based polycrylic for a less aggressive topcoat.
How do I handle intricate details or carvings on chairs?
For detailed areas, traditional sanding can be difficult. Consider using sanding sponges, folded sandpaper, or even detailing brushes with your chosen finish. For tough-to-reach spots, a small detail orbital sander or even just a stiff brush dipped in stripper (if you’re removing old finishes) can help get into the nooks and crannies.
What’s the best way to ensure an even stain color?
To help stain absorb evenly, especially on woods like pine or maple, it’s highly recommended to use a pre-stain wood conditioner. Apply it evenly and let it soak in as directed before applying your stain. Always test your stain on an inconspicuous area or a scrap piece of wood first to check the color.
How long until my chairs are fully cured and ready for daily use?
While chairs might feel dry to the touch within 24-48 hours, full curing can take much longer, often 7 to 30 days, depending on the product and humidity. During this curing time, the finish is hardening and reaching its maximum durability. Avoid heavy use, placing hot items, or cleaning with harsh chemicals until the curing process is complete to prevent damage.